Author Archives: snuffins

Jigsaw Bikinis…

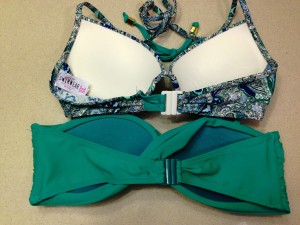
Are what you get when you have one bikini that’s a bit too big, and another that’s a bit too small :)

Since both bikinis were in a similar colour palette, I decided a bit of surgery wouldn’t look too obvious. Unpicking the stitches did take a while and it wasn’t my neatest bit of sewing, but then I was also watching Husband John play XCOM and offering helpful advice like “Reload, Reload!!”

It’s pretty obvious that the position of the clips on the green bikini will not be symmetrical, but I needed that extra bit of fabric for the paisley’s add on. It isn’t a very elegant solution, but they both fit much better and I never intend to let anyone take a photo of my back view in a bikini so I’m cool with number 8.

Bikinis

Double double, dye and trouble

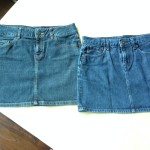
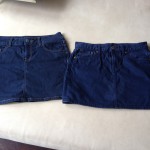
After my successful shoe refresh, I thought I’d give fabric dye a shot as Project 6. Since my wardrobe had spilled its bounty all over the guest bed as part of spring cleaning efforts, I picked out 2 well-worn denim skirts to act as my guinea pigs, and a packet of Dylon powdered Indigo Blue.

The before pictures are a little washed out, but the difference was quite marked.

The instructions on the packet were pretty straightforward, all you really need is something to dye, 250g of salt, rubber gloves and a stirring stick ( I used an old paintbrush).

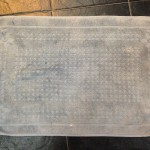
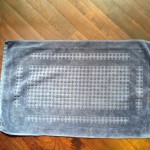
It felt a bit of a shame not to use the rest of the dye bath, since it doesn’t really lose its pigment after dyeing a few garments, so I looked around the flat with a hawkish eye, and came up with 2 bathmats. They were quite a faded gray, and are now a more pleasing blue:

I washed all the items in the sink a few times before popping them on a quick wash in the washing machine. I must admit I’m not sure how colourfast they are (don’t think I should be sitting on any white leather sofas yet..) so I may do another salt bath. The whole dyeing and rinsing process does seem to use quite a lot of water so I’m a bit wary of repeating the experiment. I’ve since rinsed out the washing machine with the added protection of baking soda and run a dark wash so I think laundry is safe, but must confess to some curiosity about placing dye directly into the machine – wouldn’t that be a recipe for pink socks/uniformly gray shirts??

This past weekend also involved another mammoth painting session (post to come) and I felt I was justified in making Project 7 a sewing medley of removing belt loops from a dress; taking a pair of pajama trousers in for Husband John, and taking in the lining to “de-poof” a dress. More smoothies were made and dinners  cooked so it was a pretty good week!

Four and a cheeky Five

I had this weekend to myself as Husband John was out of town, and it was quite a satisfying Get’er Done weekend. In addition to boring stuff like 3 loads of laundry and loo scrubbing, I manage to go for morning yoga and start the first Great Wardrobe Cull of 2014! Trying on all the clothes you have not worn in the last 12 months is a highly effective (and visual..) reality check if you have the niggly feeling you are a teeny tiny bit heavier than you should be :p But I digress..  I still need to work blogging into my weekly schedule, but I feel I’m getting better at not over-thinking the whole process. Stream-of-consciousness writing works fine for now!

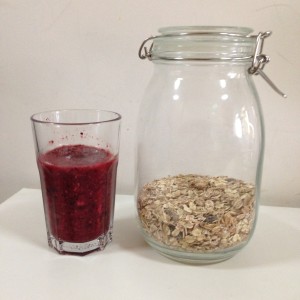
In reverse order : The cheeky five was a berry smoothie. I added some muesli (sidenote: I always feel like it should be spelt meusli..) as a trial, but I don’t think I’ll be doing it again as it detracts from the sharp tang of the berries.

Smoothies


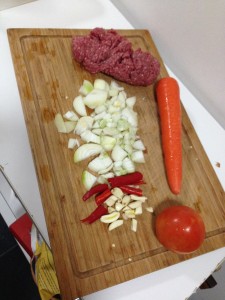
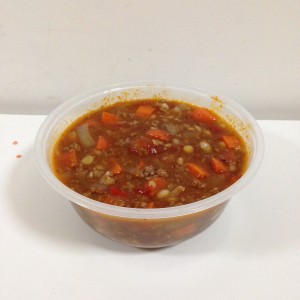
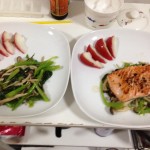
Four was proper cooking – A few weeks ago Husband John invented what he calls Meatestrone soup – basically it’s like minestrone but with beef mince and mixed pulses. Soup is such a good way of using up the good intentions veggies that are languishing in the fridge and we usually get at least 3-4 freezer meals out of our beloved Le Creuset.

Ingredients this time were :  Some garlic, onions and 1 chilli, 2 carrots, 1 fresh tomato and 1 tin of plum tomatoes,  1 beef stock cube and 1 veggie stock cubes, some dried mixed Italian herbs and extra rosemary, 150 grams of mixed pulses (pre-soaked) and 300g beef mince.

The mince looks extra brain-like in this shot..

The mince looks extra brain-like in this shot..

IMG_1742

The 2 dots in the top left hand corner are raw lentils, not spills. My kitchen counters are quite clean, promise!

Despite pre-soaking the mixed pulses for almost 18 hours, some of the larger grains were still a little crunchy after an hour of cooking. Note to self  – look up name of the crunchy grains to see if they are actually meant to be crunchy.. Hmm, also look up side effects of eating partially cooked pulses.. 


An Egg in the Hand

is worth two in the bush?

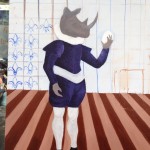
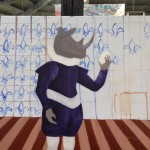
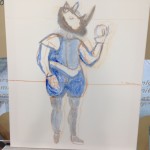
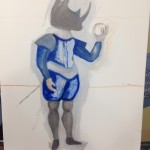
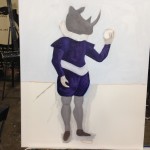
Anyway.. I knew Rhino would be holding something in his hand and looking at it contemplatively, but at first I wasn’t sure what it should be.

A crystal ball felt too obvious, although I did consider the possibility of it showing an image of Giraffe in the room(?) next door. Other alternatives were

  • a pocket watch ( but maybe too Alice in Wonderland?)
  • a cameo?
  • baby giraffe?

Finally it hit me  – an egg!
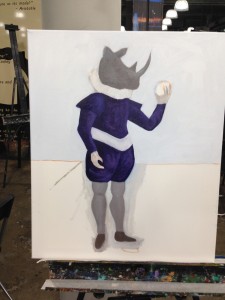
Alas poor Yorick?  Or life in hand?

Life in hand!


Husband John suggested that the egg could have a few cracks as if it’s just about to hatch, but I’m not quite sure yet. I think I like the idea of anticipation –  of not knowing when the egg will hatch or indeed what’s in the egg ( dragons would be very cool – oo brainwave, maybe that will be the next creature in the series!).
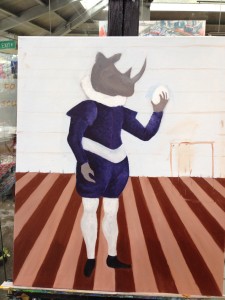
Ignore the placeholder furniture(fireplace?) in the corner

Ignore the placeholder furniture(fireplace?) in the corner

I also decided that the floor would be made of wooden planks, but I wondered if the planks should all be a uniform colour – that could make it more realistic (but with the potential for monotony), or to have it alternate colours which would be more theatrical and could relate better to Giraffe’s parlour. But then I worried that the stripes/chequerboard reference might be too literal?

I’m still not sure, but I’m rolling with it for now.

The next step was to incorporate the patterned wallpaper that had been part of the plan from day one. I considered repeating the entire pattern across the background – cue hesitation- but once the sketching started it was clear that a pattern on every grid would have made the background too busy

This is where I am now. I’m pretty pleased with my progress, but I think I do need a piece of furniture in the corner. Not a fireplace since that would mess with the lighting, but maybe a glass fronted small cabinet with something on top. One of the other artists suggested a clock so as to invoke some movement to what is essentially a static composition. I like the idea, but am not sure if it should be one of those goldy-baroquey clocks with the spinny-bit-in-place-of-a-pendulum, or whether I’d prefer to have an hourglass with shimmery sands falling through ( but would the hourglass be half full or half empty?)

I’ve considered incorporating a plant instead, but green doesn’t really feature in this series and I’m not sure if it would work.
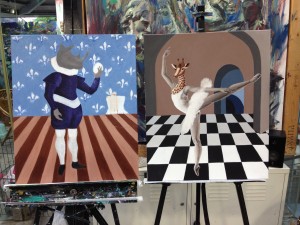
Rhino 10

Double studio session tomorrow so I’ll need to make some decisions asap!

Giraffe has a friend

I suppose the title of the post should really be  ” Giraffe’s friend is WIP” ( but then aren’t we all?), or perhaps Project 3 of 48, but this isn’t done yet so that may be breaking the rule?

After I finished the giraffe, I took I took a while to decide which animal to feature in this painting. At first I thought about doing a cheetah or leopard or some other animal with a patterned hide, but ultimately decided it would be too similar to the giraffe. A zebra crossed (teehee) my mind, but I finally decided that a chunkier animal would be a good contrast to my giraffe.

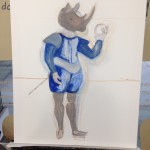
I’m really pleased with the progress of this, especially the velvet texture of his garments. The man in the inspiration photo had ribbons on this knees and shoes, but I don’t think Rhino is the kind of dude that has ribboned knees?  He may have some lace on his cuffs, and some sort of elegant brocade or bejewelled belt, but I’m leaving that until I get the background done.  He definitely needs buttons on his tunic, and perhaps some braid on the front. I’m not sure yet as he’s not a frivolous man, but he is a wealthy intellectual and I think I’ve caught him in a contemplative mood.

I had 2 plans for the background – either a rich rug or carpet on a wood floor with fairly plain but cool walls, or a plain wood floor with a fleur-de-lys wallpaper. Stay tuned to see which won :)


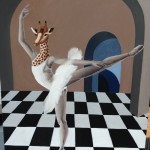
A Joyful Giraffe again

It took me more sessions than expected , but I “finished” in November 2013 :)   I’ve decided this will be the start of a series of 3 or 4 paintings. I’m not sure whether it will be a triptych, or 4 paintings arranged in a grid like a look through a dollhouse.  We’ll see where I end up – I’m naturally impatient but I’m definitely learning to enjoy the journey a lot more ( not too much, I do want to paint quicker!)


You will have a fishy

Project 2 of 48

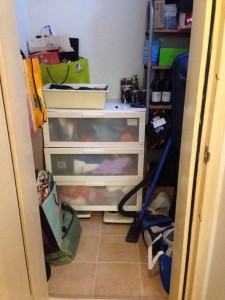
Tuesday 4 Feb was  a fairly quiet day at the office since it was just after CNY so I managed to have an uber productive evening. We had dinner together at home,  on a weeknight! And I cooked, did laundry and a giant clearout of the bombshelter-cum-store.

Now we can retrieve our vacuum cleaner without worrying about an avalanche of bags and suitcases..

Labelled drawers!


Project 48

I have decided (admittedly a little belatedly..) that I will do a Project 48 this year as a complement to my solemn vow of at least 4 posts a month. I suppose I’m being a little bit chicken about it, but 52 projects feels a little daunting and I don’t really want to set myself up for certain failure (and doom..doom..doom… :p).

I will create or remake 4 somethings a month with my hands and blog about them.

Without further ado..

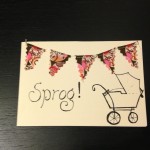
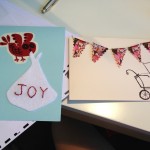
We had a number of friends and relatives welcoming little people into their lives last year – celebration cards!

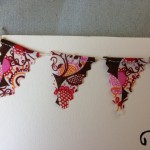
The pink bunting card was made of fabric I saved from shortening a dress. The neat factory-sewn hem was perfect for the top of the bunting, all I needed to do was cut little triangles and thread some string through. I googled pictures of prams, found one I liked and did a freehand drawing in pencil, before going over it with an inky black pen. I tried using a sharpie but found that there was too much ink bleed, so I ended up using a freebie law firm pen which worked very well.

The blue owl card was my first attempt at sewing text, I dabbled in cross-stitch when I was little but always found that to be cross-eye inducing ( pardon the terrible pun).  The felt and the owl were also leftovers from previous projects.

I’m pretty happy with the bunting card, but I think the owl card could use more elements as it looks quite bare at the moment. Inspiration hasn’t struck yet, so for now they are sat in the card box patiently waiting their turn.


Skittles’ Dress #2

Happy 2014!

I didn’t really make any New Year resolutions in 2013 save for the vague notion of keeping a monthly journal (but I managed to skip a quarter of the year..). Looking back, it seems like the first 6 months were dominated by work, and thereafter we had a series of trips with family and friends interspersed with more work and yoga.

This year, I’d like to be more deliberate about setting aside time for creativity and writing, consider this my solemn vow to post at least 4 times a month.  I have a few completed projects on the blog backburner which will help  – I think I need to reinforce the blogging habit as well as work on style and content.

And so it begins…

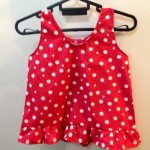
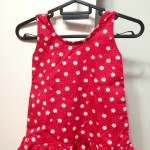
Christmas and Chinese New Year were not far away  at the time of sewing so it felt right to make a little red dress for Skittles. I started with the same pattern I used for Dress 1, but this time I added a little ruffle at the bottom. I considered adding a pocket and actually made one but the scale was off and I ran out of fabric.. oh well.

Lessons learnt this time are:

1. Technique –  bias tape to finish the collar and armholes before joining up the sides. I also need to work on sewing curves smoothly.
2. Sizing – I need to shrink the pattern to fit Asian toddlers. Although Skittles has since arrived and is not a dainty china princess, I ended up taking the dress a bit down the sides   as the arm holes seemed ginormous.  You can see what a difference it made!
3. Ruffles – I should make a single continuous ruffle instead of 2 separate pieces. The length of the ruffle should be at least double the diameter of the hem to make a flouncier ruffle. A 4 inch width would have worked better with the proportions.

I still have a couple of baby items to post about, then I shall move on to paper..


I put some “new” shoes on and suddenly everything’s right

Egad it’s September! I’m beginning to realise that blogging is not unlike detoxing-you start with the best of intentions, fall of the wagon a few weeks in, wake up and realise a month has gone by but you only had 1 dry day and scramble to do penance!

Exhibit A:  well loved and very comfy Geox Respira flats. These were a birthday parent from my mum and I’ve wore them almost every day for 2 years. They are perfect for the home-station-office-out-home commute, with the added bonus of sweaty feet defence. Originally white and navy, they’ve gotten a little worst for wear – prime candidate for a minor experiment. No photos since the close up ain’t pretty!

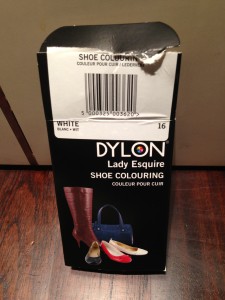
Exhibit B : Dylon leather shoe dye. The kit comes with premixed dye, a small brush and a cleaning block that looks a bit like a nail buffer.


Exhibit-B-225x300


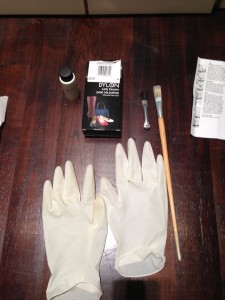
Step 1  : Assemble your weapons. The little brush that came with the kit had rather stiff bristles so I used an old paintbrush instead.

Choose-your-weapons-225x300


Step 2: Clean your item with the cleaning block per the enclosed instructions. Allow the shoes to dry, then stuff newspaper in the toes to minimise creasing.

Step 3: Shake the bottle of dye well and start painting your shoes. As with “household” painting, thin and even is the way to go. There will be an amazing moment of instant gratification as the off white shoes magically disappear right before your eyes.

Step 4 : Admire the before and after.  I left them to dry overnight and touched up the dye job on Day 2, followed by an extra coat of waterproofing on Day 3.

Tadaa!

Sidenote: I’ve worn them for around 3 weeks now in the tropical weather + rain and they’ve held up fine!